Pocket Letters: Notes of Encouragements

I am in love in making and sending pocket letters to my new friends I met at the Pocket Letter Pals Network 🙂

Have you ever heard about Pocket Letters? It is a new trend swaping trading card pocket pages with friends that you fill each pocket with 2.5″ x 3.4″ cards (standard trading card size) that you decorate and embellish them, plus on the back of the pocket, you can fill it with extra goodies that you wanna share and bless your swap friends. If you wanna know more about this Pocket Letter Pals Network, you can read all about it and watch the introduction video here from Janette Lane (founder and creater of the nextwork).

This is a new paper crafting project for me but it is just fun creating these little cards for friends 🙂 And today I wanna share with you a page a made for a new friend I met on the network at Newbie Swap Forum. She sent me a beautiful, encouraging pocket letters and some goodies with it. So lovely!

Here the page I made for her…

Pocket Letter Pals: Mini Encouraging Cards | more on the blog at http://wp.me/p1DmW0-2jv #creatingjoyfully #pocketletterpals #pocketletters #papercrafting #stamping #embossing #watercoloring #studiocalico #neatandtangled #neatandtangledbiblejournalingstamp #latinacrafter #beablessingcollection #illustratedfaith #biblejournalingstamp

I used papets from Studio Calico 6×6 pad collection that I found at TJ Maxx. I love the papers becuase they are thick enough to make these little note cards for the pockets. And love the natural color combo, too 🙂

Row 1: I made them using the Bible Journaling stamp set from Neat and Tangled. Embellished them with die cuts from Craftin Desert Diva and Martha Stewart butterfly punches. I watercolored the diecut tag and heart. And I heat embossed all the sentiments with mixed embossing powder. Yes, I mixed my Gold Embossing Powder with Clear Glitter Embossing Powder, and the the second mix is White Embossing Powder with Clear Glitter Embossing Powder.

Pocket Letter Pals: Mini Encouraging Cards - Row 1 | more on the blog at http://wp.me/p1DmW0-2jv #creatingjoyfully #pocketletterpals #pocketletters #papercrafting #stamping #embossing #watercoloring #studiocalico #neatandtangled #neatandtangledbiblejournalingstamp #latinacrafter #beablessingcollection #illustratedfaith #biblejournalingstamp

Row 2: I used the bible journaling stamp set from Illustrated Faith that I got from Big Picture Classes store. I heat embossed the sentiment on vellum paper with Black Glitter Embossing Powder and added some extra gems, enamel stars and paper doily to embelish these cards.

Pocket Letter Pals: Mini Encouraging Cards - Row 2 | more on the blog at http://wp.me/p1DmW0-2jv #creatingjoyfully #pocketletterpals #pocketletters #papercrafting #stamping #embossing #watercoloring #studiocalico #neatandtangled #neatandtangledbiblejournalingstamp #latinacrafter #beablessingcollection #illustratedfaith #biblejournalingstamp

Row 3: I used the Be The Light stamp set from Latina Crafter – Be A Blessing collection. I did some heat embossing and watercolor resist on them using Gelattos. I embelished them with some gems, paper doily and gold thread.

Pocket Letter Pals: Mini Encouraging Cards - Row 3 | more on the blog at http://wp.me/p1DmW0-2jv #creatingjoyfully #pocketletterpals #pocketletters #papercrafting #stamping #embossing #watercoloring #studiocalico #neatandtangled #neatandtangledbiblejournalingstamp #latinacrafter #beablessingcollection #illustratedfaith #biblejournalingstamp

I made some mini card vellum envelopes for thesw cards using WRMK Envelope Punch Board.

Pocket Letter Pals: Mini Encouraging Cards | more on the blog at http://wp.me/p1DmW0-2jv #creatingjoyfully #pocketletterpals #pocketletters #papercrafting #stamping #embossing #watercoloring #studiocalico #neatandtangled #neatandtangledbiblejournalingstamp #latinacrafter #beablessingcollection #illustratedfaith #biblejournalingstamp

And I added some goodies at the back of each pocket for her.
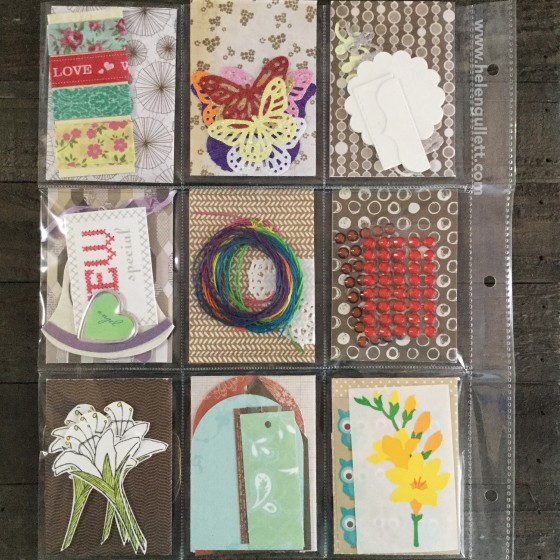
Pocket Letter Pals: Mini Encouraging Cards | more on the blog at http://wp.me/p1DmW0-2jv #creatingjoyfully #pocketletterpals #pocketletters #papercrafting #stamping #embossing #watercoloring #studiocalico #neatandtangled #neatandtangledbiblejournalingstamp #latinacrafter #beablessingcollection #illustratedfaith #biblejournalingstamp

Wrap it with big paper doily and secure it with some baker’s twine. It is ready to go 🙂
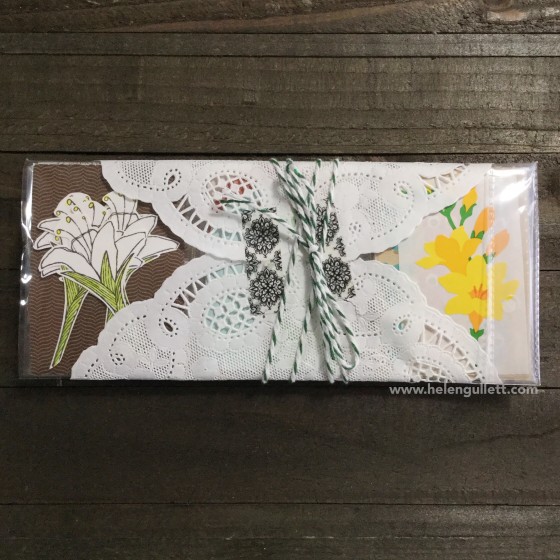
Pocket Letter Pals: Mini Encouraging Cards | more on the blog at http://wp.me/p1DmW0-2jv #creatingjoyfully #pocketletterpals #pocketletters #papercrafting #stamping #embossing #watercoloring #studiocalico #neatandtangled #neatandtangledbiblejournalingstamp #latinacrafter #beablessingcollection #illustratedfaith #biblejournalingstamp

Thank You for visiting today and I hope you find an inspiration to create something to bless others today! God bless you!


I link up this project at:

Word Art Wednesday Challenge Week 224 – 225 Anything Goes

Word Art Wednesday

WOW Embossing April Challenge

DIY Old Book Page Paper Flower

My best friend is getting and she is making some decors, one of them is paper flowers out of old-book pages. I love her flowers 🙂 and inspired by her project, todau I am sharing a project that I made out of old book pages. Pinterest has all kind of tutorials 🙂

DIY Old Book Page Paper Flower | Blog -- srcset= http://wp.me/p1DmW0-2jh | #papercrafting #diy #handmade #homedecor #paperflower #creatingjoyfully” width=”560″ height=”560″>

My flower is pretty simple. Hand cut will do. You will need these supplies to make this flower:

  • Old book pages
  • Paper trimmer
  • Scissors
  • Distress Ink for the edges (I used this CTMH but it is retired, but you can use any chocolate ink)
  • Sponge dauber (or make up sponge will work as well)
  • Glue gun & glue stick (strong liquid glue will work for the flower, but you will need glue gun for the frame)

To make the flower, first I cut the papers:

  • 12 pieces of 3″x3″
  • 12 pieces of 3″x 2 1/2″
  • 12 pieces of 3″x2″

Then each of them fold in half and cut in shape of flower perals. Next, add some distreas ink on all the petal edges using the sponge dauber. Then curl the top of each petal using scissors or anything round like stick or chopstick. After that, cut a slit a little bit at each center bottom of the petal. Using glue gun, glue the slit overlaping each other.

And then start to glue one petal starting the biggest one. I made 6 petals for each layer. Add a dap of glue at one side bottom of the petal and glue the othey until it form a circle layer of 6 petals. You will have 2 big circle of petals, 2 medium circle of petals, and 2 small circle of petals.

Then using glue gun to stack them together.

For the middle of the flower, you can fill in with the fringe cut paper like I did, or you can make more petals but smallers to fill it. To make the center like I did, you can use the left over paper strips and cut them 1″ or 1.5″ wide. Then cut to make them look like fringe. If you have the fringe scissors, that will be easier. Then roll them, add dap of glue as you roll. Then add some distress ink on them and add it in the center of the flower with glue gun.

This is the flower look like after I added it inside the shadow wood frame using glue gun:

DIY Old Book Page Paper Flower | Blog -- srcset= http://wp.me/p1DmW0-2jh | #papercrafting #diy #handmade #homedecor #paperflower #creatingjoyfully” width=”560″ height=”560″>

I adapt the original tutorial to make smaller flower like this. You cam pretty much create it in any sizes depend on the various size of petals you create.

I love making this flower and I started make more of it for more home decor project 🙂

I hope you like it and inspire to create something beautiful today! Thank You for visiting and have a fabulous day!

Happiest Birthday

There are so many inspirations and even free tutorials that I found on YouTube as I learning and growing as paper-crafter. So thankful for those who share their talents with us. And today, I am sharing a card inspired by this Kristina Werner’s YouTube video how to stamp with distress inks & doodling.

Happiest Birthday, a watercolored card using CTMH WOTG Kaleisdoskop Carsmaking Kit and Distress Ink Pads | #birthdaycard #handmadecard #cardmaking #papercrafting #stamping #doodling #watercoloring #distressink #closetomyheart #timholtz #cansonwatercolorpaper #oamandfriends

Stamp I used is from Workshops on the Go® Kaleidoscope Cardmaking Kit from Close To My Heart.

I used Canson 140lbs Watercolor Paper as the card base. Then I stamped the balloons using Distress ink pads. I wet the inks using small Paintbrush (CTMH) to give watercolor look, dried them well with Craft Heater (CTMH).

Onc they all dried, I doodled the baloon outlines, strings and bows on them using Fine-Point Sharpie Marker. And then I stamped the sentiment with Black Exclusive Ink Pad (CTMH).

I finished the card with some Silver Glitter Gems enamel CTMH.

This is a one-layerd and quick cheerful card to make. For sure, I had so much fun making this card (and 3 more… And more…) I cannot stop making them… 😀


I link up my card at:

Word Art Wednesday Challenge Weeks #224-#225 – Anything Goes

image

Simon Says: Anything Goes

Simon Says Stamp Wednesday Challenge Blog

Seize The Birthday – Topping option: Water

Sparkle & Shine Challenge #27

STAMPlorations – April CASEplorations Challenge

April 2016 SOTM Blog Hop: Life In Picture

April is here and it is time for the Close To My Heart – Stamp Of The Month blog hop.

This month there are 29 CTMH Independent Consultants showcasing the new April 2016 SOTM – Life In Picture, a D-size stamp set of 13. It  is available until April 30th, 2016!

If you arrive here from Michele Rowley’s blog, then you are in the right track 🙂 But if you are here first, you can continue hop to the next blog to make the loop. This is a big circle hop and just in case you get lost, you can always go to Melinda’s blog where you can see the full list of participants this month.

Look at these vintage cameras! Aren’t they cool? With these stamp set, you can create so many projects to keep your memories alive!

Live+in+Pictures+~+March+SOTM+2016

And the project I wanna share with you all today is a pocket letter layout for a swap friend:

Life In Picture Pocket Letter using CTMH - April Stamp of The Month and Workshop Your Way - Charlotte Scrapbooking Kit. More on the blog: http://helengullett.com/?p=8731 #ctmh #closetomyheart #sotm #stampofthemonth #workshopyourway #stamping #papercrafting #scrapbooking #pocketletter #pocketletterpals #journalingcard

Supplies I used for this pocket layout are:

  • Workshops Your Wayâ„¢ Charlotte Scrapbooking Kit
  • 12″ x 12″ White Daisy Cardstock
  • Exclusive Inksâ„¢ Stamp Pads: Black & Slate
  • ShinHanâ„¢ Touch Twinâ„¢ Marker: Leaf Green, Golden Yellow and Peony Purple
  • Durables Triangle Studs
  • White Enamel Stars
  • Red Enamel Hearts
  • Clear Sparkle Assortment
  • Coral Reef Sequins
  • Mini Stapler & Mini Staples
  • Non-Stick Micro-Tip Scissors
  • 3D Foam Tape
  • Adhesives
  • My Acrylix® Blocks: 3″x3″, 1″x3 1/2″

And here are some other inspirations from CTMH Team:

02 – Sarita L3

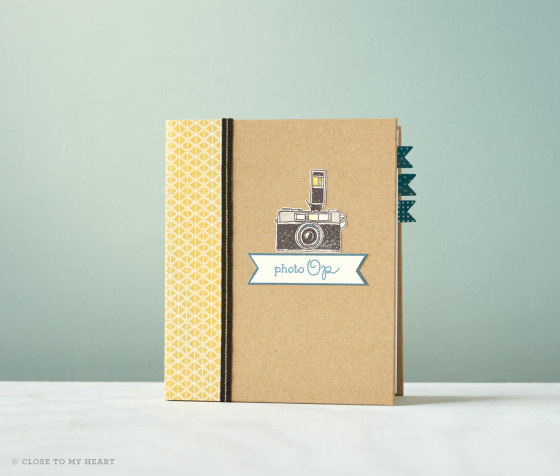
These My Creations™ Kraft 3-Ring Album and My Creations™ Hip Pics Album are ready for you to decorate from front cover through the back cover to create a special memory album for you to treasure.

02 – Sarita L3

Isn’t that layout is awesome? You can stamp the frame and cameras from this April 2016 SOTM to use as embellishments for your scrapbook layouts like on this one.

You next hop is Nancy Womersley’s blog to see what she has created for you for this April SOTM Blog Hop. And I hope you’ll find inspirations from all the Consultants 🙂

Every month, the Stamp of The Month is available for one month only, and it is just $5 when you place an order of $50 or more in Close To My Heart products. If you have any question, feel free to leave me your question in the comment box and I’ll do my best to assist you.

Thank you for visiting and have a fantastic day!

image

A Cup Of Cheer Treat Bags And An Announcement

April is here and I love Spring because we can enjoy the blooming flowers and birds are singing on the trees at our backyard 🙂

And today… I have something to share with you. I was invited to join the Coffee Loving Cardmakers Design Team! I am so excited to be part of this amazing and creative team. Amy, Chaitali and the team members have inspired me a lot! And the official announcement is on Coffee Loving Cardmakers blog 🙂

image

I also would like to share these coffee treat bags I made for couple coffee loving friends.

image

I filled these Designer Creations Slate Paper Bags with the tags I stamped using the Cup of Cheer stamp set using Cocoa Ink Pad. Those cups I stamped using Black Archival Ink Pad, I colored them with Watercolor Pencils, blended the colors with Blending Pen, and then fussy cut them using the Non-Stick Micro-Tip Scissors.

image

And for these clips… Very easy to make them 🙂 I used the small clothes pins I found at Walmart and stamped them with the coffee bean image from the Cup of Cheer stamp set using Brown StazOnâ„¢ Ink Pad. They dried in seconds! And clip them one the top of the bags with the tags.

These treat bags I filled in with some Starbucks – Via Instant packages 🙂

I hope you like my project today and THANK YOU for visiting me today! Have a fantastic day!