Merry Christmas…

Hello everyone… Today I have a CAS, Christmas card to share with you. It is quick and easy to make with digital stamp.

I am using A Christmas Hello Digital Stamp from Graciellie Design. It is a beautiful Christmas digital stamp set. I pairing it up with the Holiday Traditions Digital Paper.
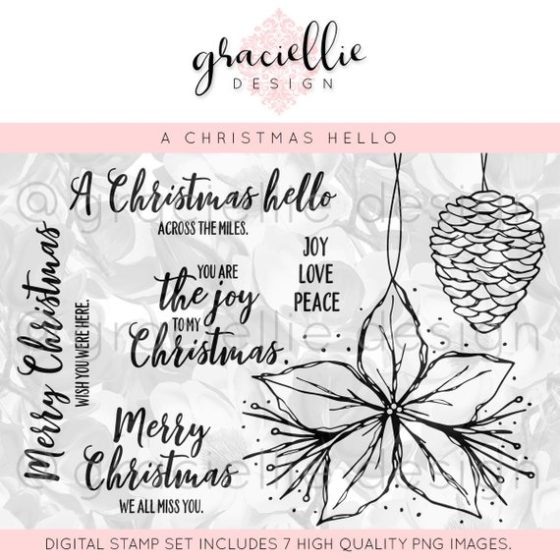
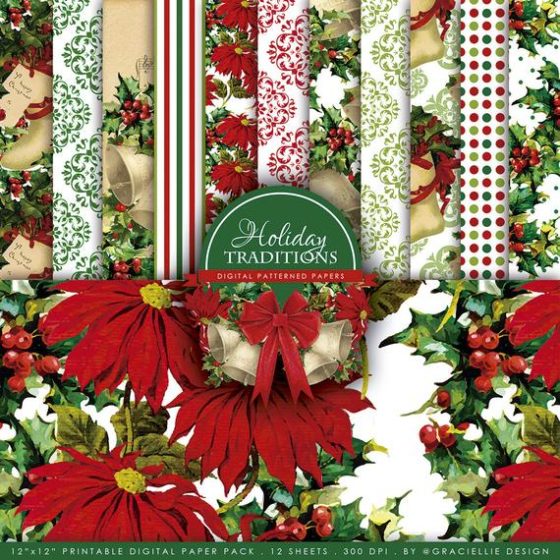
I printed one of the digital papers on a white cardstock, and then I added it on the card with adhesive glue.

Next, I printed the poinsettia and pinecone on a heavyweight white cardstock with inkjet. And then I colored it with Arteza Real Brush Pens. This time I did not use any waterbrush, I just use the brush pens to blend the colors.

After coloring, I cut the cardstock using one of the Large Banner Dies from Our Daily Bread Design. Before I added it on the card, I wrapped around the red twine that I actually colored it using the Rockin’ Red Catherine Pooler Ink and water.

I simply dabbed the ink pad on a craft mat, sprayed with water, and dibbed the natural burlap twine. I used my tweezers to mix it. But still… the ink got to my finger… I ended up with red fingers… I dried the twine with craft heater.

After I wrapped the twine around the pennant banner, I added it on the card with adhesive glue.

I added the colored pennant banner on the card with .. Then I printed the sentiment and trimmed it into sentiment strip. I added it on the card with adhesive glue.

I embellished the card with some of the clear holographic sequins for extra bling.

That’s my card today and I hope you enjoy this card today and give you more inspiration to create Christmas cards.

Thank you so much for stopping by! Have a wonderful day.


I play along at:

Anything Goes – Weeks #354 – #355

Simon Says: Let’s Get Ready For Christmas

Joy Clair New Release Blog Hop | Drink Tea, Read Books, Be Happy

Hello everyone… Today is an exciting day at Joy Clair… It is the New Release Day!!! Let’s grab your favorite drink and hop along to see the inspiration projects from the team featuring the new stamp sets.

Today, you all can check and grab the October New Release Stamp Sets at Joy Clair store. And I am sharing this card featuring the new Tea Time stamp set!

I created the background using the Broken Brick Background Stamp and using my Gelli Arts Plate with acrylic paint. After I printed the brick background, I added some Distress Ink Vintage Photo and Spiced Marmalade Ink using the make up sponge and splatter some water. It make the background looked aged. I added some white splatters using brush and white acrylic paint. I dried the whole panel with craft heater and I added it on the card with adhesive glue.

I stamped the stacked books and tea cup on a watercolor paper with VersaFine Onyx Black using Mini MISTI. And then I colored them using Leisure Arts Watercolored Pencils. I used small round waterbrush to pull the colors. I dried the images with craft heater and fussy cut them with micro-tip scissors. I added the books on the card with adhesive glue and I added the cup on top of the book with 3D Foam Tape.

I stamped the sentiment with VersaFine Clair Pinecone Ink Pad with Mini MSITI, trimmed it into banner, and I added it on the top left corner card with 3D Foam Tape.

BLOG HOP AND GIVEAWAY

To celebrate this release, Joy Clair is giving away a $25 gift certificate to ONE lucky winner! Please leave a comment on the Joy Clair Blog and ALL Designers Blog by Sunday, October 7th, for a chance to win. The winner will be announced on the Joy Clair Blog on October 31st, 2018. 

Our new products are now available in Joy Clair Store! We hope you find something you like!

Are you ready for more inspiration? Here is the list of design team members hopping…

Joy Clair Blog

Martha Lucia Gomez

Angie Cimbalo

Lindsay Adreon

Andrea Bjork

Jenny Fruchey

Ceal Pritchett

Monica Maier

Donna Idlet

Nicole Winslow

Helen Gullett

Kerry Urbatch

I hope you are inspired by my project today. THANK YOU SO MUCH for stopping by my blog. Have a wonderful day!

Project Thursday | DIY Mini Halloween Candy Bags

Hello everyone… It is here for a Project Thursday. Today, I have some easy-to-make DIY Mini Halloween Candy Bags to share with you all.

I am using the Beware Stamp Set on this project. It is a fun Halloween themed stamp set for sure!

There is a little girl image in this stamp set and I thought it will be a cute one to use as to embellish these bags.

I stamped the girl and sentiment using the VersaFine Clair Nocturne Ink Pad. I used 1″ Circle Punch to cut out the circles.

I made the paper medallions using halloween scrapbook papers that I cut into 1 1/4″ x 12″ paper strips. Then I scored each of them at every 1/4″, folded, and glued each circle on top of the medallion using strong adhesive glue.

I stamped the sentiment on a grey cardstock using the same ink pad, trimmed them, and then added on the medallions with strong adhesive glue.

To read the Project Thursday tutorial how to make the mini bag, head over to Precious Remembrance Shop Blog. I hope you all can visit me there and like the project.

Thank you so much for stopping by my blog today. Have a wonderful day!

CAS Card | Thankful

CUTplorations Challenge

It is official… October is here and Fall is here, too! I am thankful for this season just like this quote from L. M. Montgomery, “I am so thankful to live in the world where there are Octobers”. Today, I have a CAS, Thankful card to share with you all.

The inspirations from the CUTplorations October Challenge image is what inspire my card today that I created using the Crazy Double Running Stitch Rectangle Nesting Dies, Bracket Labels/Tags Nesting Dies, Thankful Word Die, Wonderfall Time Stamp Set.

First, I created the background using smooshing technique with Distress Ink Pads (Spiced Marmalade and Wild Honey) and water. I used watercolor paper for this technique. I dried the watercolor paper with craft heater and then I stamped the leaves from the Wonderfall Time Stamp Se on the watercolored panel with VersaFine Clair Summertime Ink Pad. After stamping, I cut it with the largest size of the Crazy Double Running Stitch Rectangle Nesting Dies. I added it on a white card with adhesive glue.

I cut a piece of brown glitter cardstock using one of the Bracket Labels/Tags Nesting Dies and then cut a piece of white cardstock with the smaller size from the same nesting die set. I added both of them on the card with adhesive glue.

I stamped the pumpkin from the Wonderfall Time Stamp Set with VersaFine Onyx Black Ink Pad and then colored it with Arteza Real Brush Pens and blended the colors with waterbrush. I dried the image with craft heater and then fussy cut it with micro-tip scissors. I added pumpkin on the card with adhesive glue, too.

For the sentiment, I cut a piece of gold metallic cardstock with Thankful Word Die and I added it on the card with the same adhesive glue.

I hope this CAS Thankful Card inspires you to play along with the CUTplorations October Challenge. You have whole month to play along and link up your projects. And oh… please check the new challenge guidelines here. We cannot wait to see your projects!

Oh and… when you use any STAMPlorations products on your projects, you can also link it up at STAMPlorations Neverending Anything Goes Challenge:

Before you all go…. Here’s a special discount code for you to use at STAMPlorations Store: STAMPGIRLHELEN to save 20% OFF on all your order.

Thank you so much for stopping by today. Have a wonderful day!!!

Happy Fall Y’all

Joy Clair Stamps

Happy Fall Y’all! October has arrived and it is official Fall is here, too. I am so grateful for this wonderful season God has created for us.

It is time for new challenge! And today, I have a Fall/coffee themed card to share with you all that I created using stamp sets from Joy Clair.

Here are the photos that inspire me to create this card for the Joy Clair October challenge:

I used the Harvest Blessing Stamp Set and Christmas Cocoa Stamp Set on this card.

I stamped the cups and pumpkins on a watercolor paper with VersaFine Onyx Black Ink Pad using my Mini MISTI.

After that, I colored them using Leisure Arts Watercolored Pencils. I dried the images and then fussy cut them with micro-tip scissors.

I added some of the Spiced Marmalade Distress Oxide Ink and Fossilized Distress Oxide Ink On another watercolor paper that I cut into 4.25″ x 5.5″ using smooshing technique. After that I dried it with craft heater and then I added it on a card with dries-clear adhesive.

I stamped the sentiment twice with HA Ombre Autumn Ink Pad using Mini MISTI.

Next, I added the shorter cup on the card with dries-clear adhesive and then I added the taller cup with 3D foam tape.

That’s my card today and I hope this give you an inspiration to create and to join the October Challenge.

Thank you so much for stopping by today. I hope you all have a fabulous day!