2019 Fall-Winter Coffee Lovers Blog Hop | Coffee, Cocoa, Or Tea

Hello again… Coffee Loving Friends… The 2019 Fall – Winter Coffee Lovers Blog Hop starts today!

This Fall – Winter Coffee Lovers Blog Hop starts from Friday, November 1, 2019 until Friday, November 8, 2019. You can link up your projects anything goes, caffeinated projects [coffee, tea, cocoa, hot apple cider] but your projects should be new, not previously posted, please no back linking.

And please check out all of the AMAZING Super Sponsors and give them some love for their generous sponsors to our coffee loving community!

Kicking off this blog hop… I made these three caffeinated cards with Graciellie Designs Digital Stamps and Digital Paper Packs:

On this first card, I use the newly released Cuddle In A Cup Digital Stamp Mini Bundle and Cozy Christmas Digital Paper Pack.

I colored this cup with Spectrum Noir Primaries Coloring Pencils and Baby Oil. For the cup, I added some glitter on it with Ranger Stickles.

I dried the whole image with craft heater and then fussy cut it with micro-trips scissors.

On this cocoa card, I use the newly released Cherry Cocoa Digital Stamp Mini Bundle and the Cozy Christmas Digital Paper Pack.

I used my Silhouette Studio Software to fill the cup with the patterned paper and then printed it out.

To create that shaker, I used Double Stitched Rectangles Dies and Double Stitched Ovals Dies from Divinity Designs.

I colored the cup with Prismacolors Coloring Pencils and Colorless Blender Pencil. I added some extra splatters on the card with Finetec Gold Watercolor paints and fan brush.

On this tea card, I use the newly released Book Lovers Digital Stamp Mega Bundle and the Book Lovers Digital Paper Pack.

I colored the image with Prismacolors Coloring Pencils and Baby Oil. I dried it with craft heater and then fussy cut it with micro-tip scissors.

On all the caffeinated CAS cards, I printed the digital stamps and papers with my inkjet printer and I also used the Scrapbook Adhesives – EZ Grand Runner and 3D foam tape.

GIVEAWAY and SALE

Gracie has lots of gorgeous digital stamps and papers on her shop that you will LOVE! Make sure you visit her blog post also to see how you can enter her giveaway and to see more inspirations.

And… I am also giving away a handmade card and a $5 Gift Certificate to spend at gracielliedesign.shop to one of you who leave comment on my blog post and sign up to my newsletter (fill out the form on the sidebar). I will pick the winner randomly and will announce the winner on November 9th on my blog.
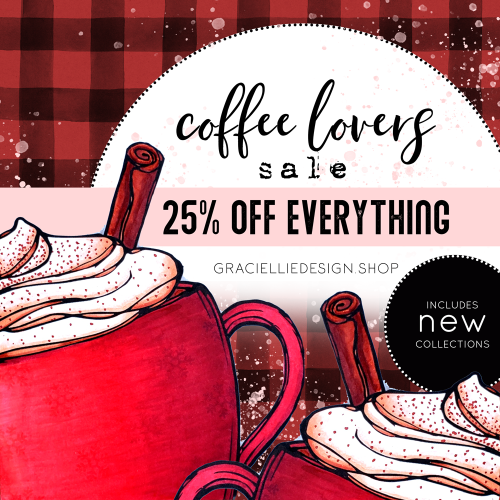
Starting today, GET 25% OFF EVERYTHING!No code needed. The sale end on November 8. Perfect opportunity to try out our digital stamps and papers for the first time or simply stock on all your favorites! Visit us at gracielliedesign.shop today! 

Thank you so much for stopping by my blog today… Have a fabulous caffeinated day!


I also link up at:

Stencil Challenge November | Fall Blessings For You

Happy November!!! Fall has arrived, leaves changed their colors and fell off the trees already. We hope you all have a blessed season wherever you are right now…

It’s time for a new STAMPlorations stencil challenge and it is always an anything goes challenge with a stencil. You can create any type of projects (cards, ATCs, art journal pages and anything else that you can think of creatively!). Only one main thing you need to use on all your projects: use at least one stencil. We would love to see how you use your ARTplorations stencils, but you can also use any other brand of stencils. And… please make sure that you make new project and link back to our challenge blog post to be eligible to enter to win the prizes.

On my card today, I use the Barley ARTplorations Stencil, Wonderfall Time Stamp Set and Crazy Double Running Stitch Rectangle Nesting Dies.

I used stamping with stencil technique to create that stenciled background using Distress Ink Pad and water. After stamping, I dried it with craft heater and then cut it with the rectangle dies. I added it on top of a white card with adhesive runner.

I stamped the sentiment with VersaFine Clair Pinecone ink pad and tied up with some natural twine ribbon on the top of the card.

That’s it, pretty simple and quick to make for mass produce, too. I hope you all will play along with our November Stencil Challenge! And if you use any of STAMPlorations products, you can link it up at the Never-Ending Anything Goes Challenge, too.

Cannot wait to see your projects with stencils this month! THANK YOU SO MUCH for stopping by my blog today! Have a wonderful and blessed day!

STAMPlorations Throwback Thrusday | Thanksgiving Cards

Hello hello hello everyone… It’s the October 31st, so are you all ready for Halloween and trick-or-treat? I know my kiddos are so ready!

On this last Thursday of the month, it is the Throwback Thursday feature post at STAMPlorations. And today is my turn to share my projects on the blog today.

This card that I made back in October 2018 that inspired me to create those three Thanksgiving cards. As you can see, I am inspired by the theme, background, pumpkin, colors, design, and word die.

On my first card, I used the Wonderfall Time Stamp Set, Be Thankful Stamps and Coordinating Die, Stitched Tags Nesting Dies, and Crazy Double Running Stitch Rectangle Nesting Dies.

For the background, I used ghosting technique. I created the watercolored background with the Leisure Arts Double Ended Markers.

I scribbled the markers on my blending palette (it is simply a laminated cardstock, actually!) and then I sprayed with water.

I added the watercolor paper on it, and gently pressed it dow to blend the colors. I let it sit for a minute to let the watercolor paints soaked into the paper.

I dried the watercolored paper with craft heater and then I stamped the leaf with water. I dabbed off the water with paper towel every time I stamp and then dried it with craft heater. This is a fun and simple way of creating ghosting stamping background.

I stamped the pumpkin with VersaFine Onyx Black and colored it with Leisure Arts Double Ended Markers and waterbrush. I added some white acrylic paint splatters on it. After I dried it with craft heater, I fussy cut with micro-tip scissors. I stamped the sentiment with Cheerful VersaFine Clair Ink Pad and Summertime VersaFine Clair Ink Pad on a white cardstock.

This second card is a no-stamping card. I created it using the Doodle Autumn Pumpkin Cover Plate Die and Thankful Word Die. I use the inlaid die cutting technique to highlight the pumpkin on the card and then I added the word die on top of it with 3D foam tape.

For the last card, I use the Choose To Be Grateful Phrase Die and one of the coloring page from the Blossom Bliss: Ready-To Color Floral Themed Card Fronts.

I colored the page with Watercolor Pencil and I used Colorless Blender Pen to blend the colors instead of using waterbrush. After that, I added some white acrylic paint splatters on it with fan brush. I dried it with craft heater and I added it on the card with adhesive glue runner.

I cut a piece of brown glitter cardstock and white cardstock using the phrase die and I stacked them together with dries-clear adhesive glue. I added it on the card with 3D foam tape.

GIVEAWAY

Visit and leave comment both STAMPlorations blog post and my blog post for chances to win A $15 gift code. The winner is one commenter drawn from all comments left on the Throwback Thursday post for the month.

THANK YOU SO MUCH for stopping by my blog today. I hope you all have a wonderful day!

Coffee Loving Cardmakers | Hello Bobalicious

Hello… hello… hello… Coffee loving crafty friends! Happy Friday! Today, I am joining a fun bobalicious collaboration blog hop with Coffee Loving Cardmakers and Paper Smooches!

This blog hop starts at Paper Smooches Blog and Coffee Loving Cardmakers Blog where you all can see the full list of participants. And check out the info about the giveaway and how you can enter to win. Info at the bottom… You should arrive from my coffee loving teammate, Kerry.

On this blog hop, we are featuring the newly released stamp sets and die: Caffeinated Stamp Set, Caffeinated Two Stamp Set, and Caffeinated Icons Dies.

Here’s my first card that I created using the Caffeinated Icons Dies to create that cup. I cut put the silver glitter cardstock for the base cup, white cardstock for the lid, and pattered cardstock for the sleeve.

For the background, I used the matching patterned glitter cardstock from the same paper stack, then I cut out a piece of vellum paper to add on the rectangle frame.

For the sentiment and cup logo, they are from the Caffeinated Stamp Set. For the circle logo, I stamped it with Pinecone VersaFine Clair Ink pad and heat embossed it couple times with clear embossing powder. And I stamped the word hello on a cream cardstock and trimmed it into sentiment ribbon banner.

On my second card, I use the Blossoming Buds Stamp Set to create that patterned background. I stamped the flower with VersaMark ink pad on a soft lavender cardstock. I trimmed it and added on a white card with EZ Runner Grand.

To create this bubble tea cup, I stamped the cup with Nocturne VersaFine Clair and heat embossed it with clear embossing powder. After that, I cut it with the matching die.

I stamped the bubbles inside the cup with Blue Belle VersaFine Clair and heat embossed them also with clear embossing powder. After that, I colored the cup with the Leisure Arts Double Ended Markers and waterbrush. I sprinkled with some water and dabbed it off with paper towel.

I dried it with craft heater and then wipe off the extra color on top of the embossed bubbles. I added extra highlight on the bubbles with Signo Ball White Gel Pen.

I stamped then sentiment from the Caffeinated Two Stamp Set on another lavender cardstock with the Blue Belle VersaFine Clair ink pad, trimmed it, and added it on the card with 3D foam tape. Then, I stamped the other words on the card with the same ink.

GIVEAWAY

To enter the giveaway is pretty simple. As usual, you need to leave comments along the way for a chance to win a $25 Gift Certificate to be selected from participating blogs (comment on all). Must comment by November 6th at 11:59 PM Pasific Time. Winner will be announced the following week on Coffee Loving Cardmakers blog.

You next stop is my coffee loving teammate, Lisa. You will find lots of fabulous projects along the way!

Thank you so much for stopping by my blog today… Have a fabulous caffeinated day!

STAMPlorations 6th Birthday Celebration

Hello hello hello everyone. Today is another celebration day for STAMPlorations! This celebration is super fun and there are 3 ways that you can join us.

Visit STAMPlorations Blog for the full details on this Birthday Celebration and also you can find the posts where you can link up projects, links to the designers’ blogs, and of course the PRIZES info!!!

Today, we are featuring the new birthday cover plate dies: Zen Doodled Birthday Cake and Zen Doodled Birthday Gifts. And I have 2 projects to share with you all that I created using the new Zen Doodle Birthday Gifts Cover Plate Die:

First project is this birthday gift box. I made the box with the WRMK Envelope Punch Board and patterned green cardtock.

The front of the box, I decorated it with the cover plate die cut. I cut out a light green and blue metallic cardstock. I glued it on a white cardstock. I took some of the blue pieces and added it to the gift box and bag.

For the sentiment, I used one of the Just Everyday Greetings Clear Stamps. I added the sticker on a white cardtock, and trimmed around it. I added on the panel with adhesive glue.

I added the finished top front panel on the box with permanent glue and then tie up a piece of ribbon around the box for embellishment.

For the second project, it is quick and simple birthday card. I used the metallic blue piece that I cut with the cover plate.

I made a watercolored background with Leisure Arts Double Ended Markers and waterbrush. I used the smoohing technique to blend the colors and dried it with craft heater. After that, I sprayed it with some water using distress bottle and dabbed off the water with paper towel.

I added the watercolored background panel on a white card base with adhesive glue, and then I added the blue die cut panel on top of it using dries-clear adhesive glue.

I cut out a white cardstock using the Celebrate Big Phrase Die, I cut it twice. After that, I stacked them with dries-clear permanent glue. I added it on the card with the same glue.

I hope you all enjoy these projects and hope you all can come to join us at this BIRTHDAY CELEBRATION!!!!

Thank you so much for stopping by today. Have a fabulous day!