Hello again… Coffee Loving Friends… The 2019 Fall – Winter Coffee Lovers Blog Hop starts today!

This Fall – Winter Coffee Lovers Blog Hop starts from Friday, November 1, 2019 until Friday, November 8, 2019. You can link up your projects anything goes, caffeinated projects [coffee, tea, cocoa, hot apple cider] but your projects should be new, not previously posted, please no back linking.
And please check out all of the AMAZING Super Sponsors and give them some love for their generous sponsors to our coffee loving community!

Kicking off this blog hop… I made these Zen Doodled Coffee cards with Zen Coffee 2 Cover Plate Die, Coffeecionado, Just Caffeinate Clear Stickers and Crazy Double Running Stitch Rectangle Nesting Dies.
I used positive and negative stamping with cover plate die with Distress Ink Pads and water to crate these cards.

I laid the cover plate die on top of the watercolor paper and using blending brush, I added the colors. I removed the watercolor paper, and then I sprayed the cover plate die with some water lightly, and then I added another piece of watercolor paper on top of that inked, wet cover plate. I gently pressed the paper. I picked up the paper off the cover plate and dried it with craft heater right away.
I sprayed both papers with water lightly with Distress Sprayer bottle and then I dabbed off the water with paper towel and dried them again with craft heater.
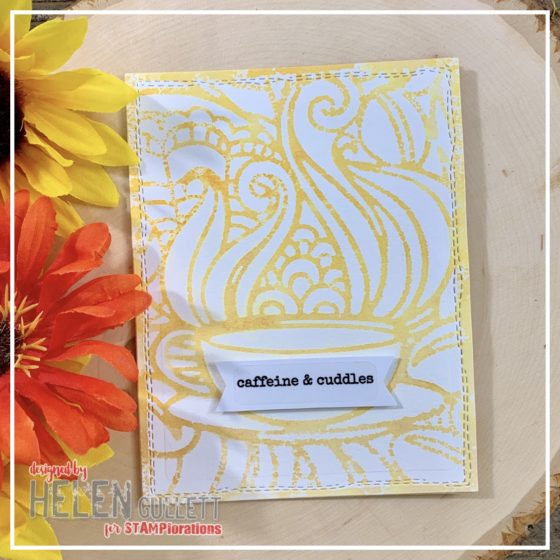
I cut out both background panels with the stitched rectangles dies and I added them on white cards with Scrapbook Adhesives EZ Gran Runner and I added the sentiment on the card with Scrapbook Adhesives 3D foam tape.
GIVEAWAY, SALE, COUPON CODE
Both of these CAS cards are easy and quick to make for sure. Make sure to visit STAMPlorations Blog for more caffeinated inspirations and to enter the giveaway from Shery and to grab the free digital stamp!
And… I have these stencil and handmade card to giveaway to one of you who leave comment and sign up to my newsletter (fill out the form on the sidebar). I will pick the winner randomly and will announce the winner on November 9th on my blog.

This is one of the stencils I designed and used on this card. You can find all my stencil designs at STAMPlorations Store. Here’s a 20% OFF coupon code for you to use when you check out: STAMPGIRLHELEN when you check out.
The coffee cup on the card is from Bloomdala Coffee Cup To Go Digital Stamp from STAMPlorations Digital Store and Coffee Can Fix Everything Phrase Die. (Note: digi stamp not included, just the stencil and card I made).

And before you all go… Here’s a special sale at STAMPlorations Store this month… PLUS an extra 20% OFF coupon code for you: STAMPGIRLHELEN

Thank you so much for stopping by my blog today and I hope you all have a fabulous caffeinated day!