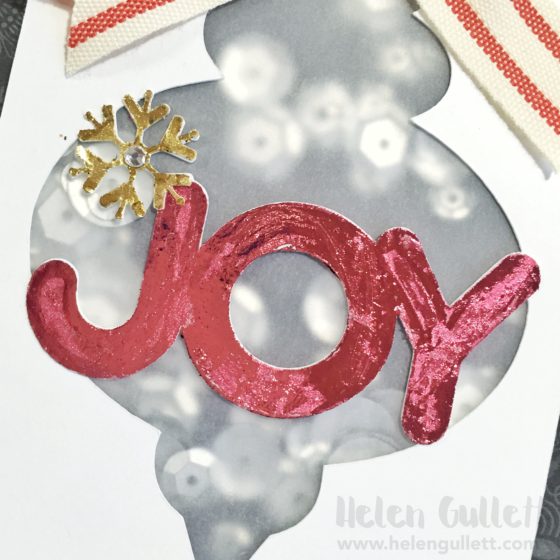
Good morning 😊 I am here today to share another Christmas In July project. Today is a fun shaker card with some foiled elements. There are many ways we can create shaker cards. One of my favorites ways is making shaker cards with Silhouette Cameo.
This time, I am using one of the beautiful cutting files from The Cutting Cafe – Christmas Bulb Greetings set. In these file sets, you will recieve cutting files you can use with any electronic cutting machine and also template you can use to cut out the shapes if you do not have cutting machine. Also, there are printable digital Christmas sentiments! It is all what you need to make shaker cards!
I imported all svg files to my Silhouette Studio library. Them I opened the Joy cutting file set, and send it them to cut. And my Silhouette Cameo machine cut them all at once in a jiffy!
I used Darice – White Cardstock 120 lbs for the pieces and card base. The background is one of mh favorite Chritmas stash, it is one of the patterned paper from CTMH – Snowhaven paper packet (retired).
Once I have them all cut, I used my Silhouette spatula to pick them up from the cutting mat. You can use any flat tool to pick the smaller pieces off the sticky mat.
I set asidr the panel. Then I added some glue on the snowflake and the word joy using Martha Stewart felt point glue pen. You can use any liquid glue for this step. I covered the whole surface and let it dried for couple minutes until they felt tacky to touch.
This is one of the tricks to add foil on projects without using laminator or Minc machine.
Then I added the Deco Foil on them. I used the gold foil for the snowflake and melon foil for the word joy. There were still some white spots on the pieces when I lifted up the foils. To fix that I added some glue on the white spots, let them dried and added more foil on it until all covered.
I used my bone folder to make sure the foils stick on the pieces. The woalah! They are shiny now!
Then I added the foiled pieces on the base panel with glue pen.
Next step is creating the shaker. This time I used Vellum paper instead of acetate for the shaker window. I think it gives softer look behind the shiny foiled elements.
I added 3D foam tape behind the base panel after I glued the vellum paper, and then added some assorment silver sequins I got from Hobby Lobby.
I finished the card with a bow I made from Stripes Red Ribbon from CTMH (retired). And a bitty sparkle gem on the snoflake.
And check it out how fun it is to shake this card 🙂
I hope you’re inspired today and like this card as much as I do. Thank You So Much for visiting! Have a fabulous and blessed day!
I play along at:
Camp Create 2016 – Fantastic Foiling
AAA Cards Game #69: One Stash Favourite


wow this is am amazing card, so well designed and very creative, love you made thus a shaker, it will be a joy for someone to open. Great to see you at AAA
Thank You so much, Sandie 🙂
Fabulous shaker – I really like the look of the vellum instead of the usual acetate. Thanks for playing at AAA Cards.
Thank You so much, Jane, for visiting 🙂
what a beautiful christmas card Helen, I love all of the different elements on this card…you rock…hugs
Thank You, Regina!
Shiny and beautiful JOY and the snowflake in Gold
aku ga suka bikin shaker card
always amaze if see ladies make Shaker card
love this beautiful creation Helen
kalo smpt besok mampir ya
anak2 liburan kemana say
kami start liburan 1 August mau ke belanda aja seminggu hehe
hugs
Monika
Thank You Monika 🙂 Enjoy your vacation!
Fabulous shaker card – so well done. I like the use of the foil. Thanks for joining us at CAS Mix Up.
Thanks Susan 🙂
Sorry – I meant to say in my comment “Thanks for joining us at Happy Little Stampers”.
😉
What a lovely shaker card Helen and I love your foiling technique! So pretty.
Thanks for sharing with us at Happy Little Stampers and I hope we will see you again soon.
Hugs
Carol x
Thank you so much, Carol 🙂
What a beat shaker card, thanks for joining us at AAA Cards!
Thank you, Ceal 🙂
Fab shaker card, Helen, and thanks for the photo tutorial on how you made it!!
Thank you so much, Linda for visiting.