Dare 2B Artzy – 3D Holiday Projects Instagram Hop

Hello hello hello… December is here! The Holiday season is here, too! You all are invited to the Dare 2B Artzy – 3D Holiday Projects Instagram Hop today.

Today, I am joining the Artzy Designers sharing some 3D Holiday Projects to give you some inspiration!! The Instagram hop starts at the D2BA Instagram Page where you will see the full list of participants.

Join in our IG hop and follow the steps to enter the giveaway for your chance to win one of the two $10 gift certificates to the Dare 2B Artzy Store.

We are also having a sale! 15% off orders, with code XMAS2020 The Sale starts now and ends Sunday, Dec 6, 2020 at midnight CST. 

Thank you so much for stopping by my blog today!

DIY Family Puzzle Picture Board

Hello hello hello… Happy Friday! Today, I would like to share with you a fun home decor project.

I made this Family Picture Board using the one of the new Clear Scraps Wooden Puzzles and Mini Shaker Family. I am sharing this project at the Clear Scraps Blog today.

I started with tracing each puzzle piece on each scrapbook paper with pencil. After that, I cut each of the scrapbook paper with scissors.

I added the cut out paper on top of each puzzle piece using the 3-in-1 Beacon Adhesive Glue. And then, I used wood glue to put together the puzzle and let it sit to dry.

While waiting for the puzzle to dry, I put together the Mini Shaker Family. I stacked each layer of the chipboard piece with 3-in-1 Beacon Adhesive Glue. I put a heavy book on top of it while the glue was drying.

I removed the clear plastic covers from both sides of the acetate plastic and then I glued it on the other chipboard piece using the same glue.

Before I added the top layer, I added some beads inside it as the shaker filler. And then I added the top layer with the same adhesive glue, too. I put the heavy book again on top of it while the glue was drying.

When the house puzzle pieces were glued well, I added the finished Mini Shaker Family on the middle top part of the puzzle board with 3-in-1 Beacon Adhesive Glue as the title of this picture board.

I added the thick burlap twine on top of the puzzle board and secure it with the same adhesive glue. After that, I added the mini clothes pins on the burlap twine. I simply clipped them, no glue. But if you would like to keep them in place, you can use either strong permanent glue adhesive or wood glue to secure the in place.

I hope this project give you another inspiration to make fun home decor with Clear Scraps.

Thank you so much for stopping by our blog today. Have wonderful day!

DIY Coffee Clipboard Decoration

Hello everyone… My project today is a fun decoration that I created inspired by things I love: Jesus and coffee.

I share the step-by-step tutorial on the Clear Scraps Blog today using the Clipboard Mini Deco, Coffee Mug Chipboard Embellishment, 4×6 Coffee Stain Stencil, alcohol inks and blender, DecoFoil sheets, Graciellie Design digital stamp, Divinity Designs dies, D.L. Arts Wrinkle Ribbons, Memento Luxe ink pad, Distress Ink, scrapbook papers, 3-in-1 Beacon Adhesive Glue, and 3D foam tape.

I hope you all like this project and get an inspiration to create a home decor project.

Thank you so much for stopping by my blog today. Have wonderful day!


DIY Card Caddy Gift Bag

Spring flowers are blooming. New season has arrived and that reminds us there is always new hope and mercy coming into our lives. Be strong, my friends

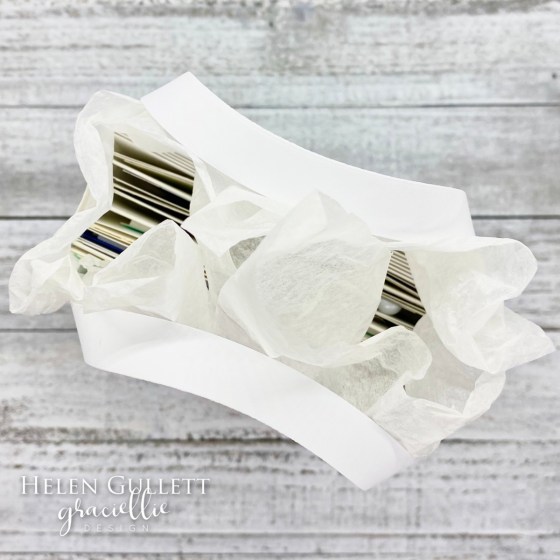
Today, I would like to share this card caddy gift bag that I made for a friend. This gift bag is filled with 10 handmade cards and envelopes.

On my card caddy gift bag, I used several Graciellie Designs gorgeous designs: Friends Like You digital stamp (flower), God’s Grace digital stamp (sentiment), and couple patterned paper from Pink & Blue Watercolored digital paper pack.

I cut out heavyweight white cardstock using Divinity Designs Card Caddy & Gift Bag Dies Set. I used strong permanent double sided-tape to put this card caddy gift bag together. For the handles, I used permanent liquid glue.

I printed couple patterned paper from the digital paper pack. I added a thin layer of liquid glue around the patterned paper and then while it was still tacky, I added the Therm O Web DecoFoil Gold sheet. Now, it has gold frame for extra shine.

I added those 2 patterned papers on the front of the card caddy gift bag using permanent adhesive glue. I added White pearls at four corners.

I cut out the printed sentiment using the Divinity Designs Double Stitched Rectangle Dies and then I added it on the bag with permanent adhesive glue.

For the 30-day coloring challenge at Kathy’s blog today, I colored the flower with Pearlescent watercolor paint. I really wish that my camera can capture the pearly look on the flower. I added the flower on the bag with 3D foam tape for extra dimension.

The gift is done and ready to be delivered. I hope this project sparks an inspiration for you today.

Thank you so much for stopping by my blog. Have a wonderful blessed day!

Clear Scraps | Faith Over Fear Pallet Sign

Hello everyone… I hope you all are safe and doing well… I have a wood pallet sign to share with you all.

This Faith Over Fear Pallet Sign I created using the Square Medium DIY Pallet Shape and Faith Over Fear XL Script Wood Quote. I am sharing the full detail about this project at Clear Scraps Blog.

I know that we all have been through uncertain days in these last several weeks. But I hope this sign can be a reminder for all of us to have faith than fear, to help us to remember that God in whom we have put our trust is at work in our lives every single day and give you the Holy Spirit.

“I pray that God, the source of hope, will fill you completely with joy and peace because you trust in him. Then you will overflow with confident hope through the power of the Holy Spirit.” (Romans 15:13, NLT)

Thank you for stopping at my blog today. Have wonderful, blessed day!