a2z Scrapbooking | Coffee or Tea?

Hello crafty friends, I am so thrilled to be a guest designer today at a2zscrapbooking blog!

This month’s challenge theme is Anything Goes and I go with coffee and tea cards for this challenge:

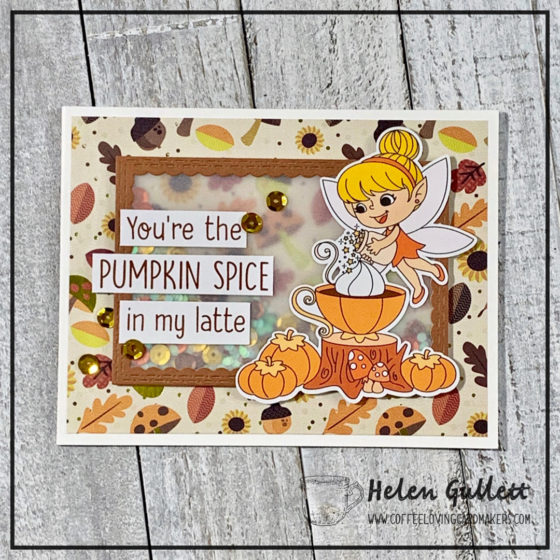
On my first card, I use the Kit-Tea Stamp & Cut set. I stamped the flowers and leaves image on a watercolor paper with VersFine Onyx Black ink pad.

And then, on my craft mat, I scribble some of the Double-Ended markers (yellow and red), spray with water, and then I smooshed in the watercolor paper. I cut it out with one of the rectangle dies and I added it on a yellow card with E-z Runner Grand.

I stamped the cat in a cup image with same ink pad, and the I colored it with the same markers and waterbrush. After that, I dried it with craft heater and then cut it with the matching die.

I added on the card with 3D foam tape. Next, I stamped the sentiment on a white cardstock with the same ink pad and then trimmed it into sentiment label. I added it on the top left card with 3D foam tape also.

Next project is this CAS coffee card. It is pretty simple to make. So, I started with creating the gradient square watercolored background.

On an acrylic block, I scribble some of the Double Ended markers (red and pink), I sprayed it with water, and then I stamped it on a watercolor paper. I let it sit on the card for a while and held it with some more stamping block.

While waiting for the watercolor paint to dry, I stamped the mug with Delicata Golden Glitz ink pad on another watercolor paper. I dried the ink with craft heater and then colored it with the Double Ended Markers and waterbrush. After that, I dried it with craft heater and then I fussy cut it with microtips scissors. I stamped the foam and sentiment on the cup with Mini MISTI using Memento Cocoa ink pad.

I removed the acrylic blocks from the watercolor paper, then I trimmed it slightly smaller than the white card base. I added the background paper on the card with E-Z Runner Grand, and then I added the coffee mug in the middle of it with 3D foam tape. I decorated it with some natural twine ribbon.

That’s all my projects today! I cannot wait to see what you will create for this month’s challenge!

List of supplies:

Thank you so much for stopping by my blog today. Hope you all have a fabulous day!

Better Together Forever

Hello everyone… I hope you all are having a good week so far. Today, I have simple, black and white card to share with you all.

Earlier this month, Gracie has announced new digital stamp sets at her store. On this card, I used one of them called Beautiful Destinations. This digital stamp set is also available in rubber stamp which you can grab the Difficult Roads Stamp Set at Unity Stamp Company.

I also use the Magnolia Dreams SVG Files for the background that I cut a black cardstock using the background file with Silhouette Cameo 3. I added it on a white card with liquid adhesive glue.

I opened the flower in the jar image with Silhouette Studio software, resized it, traced it and then created cutting line. I made couple duplicates and then printed them in black and white with laser printer.

After printing and then cutting the jar with Silhouette Cameo 3 and I added a piece of DecoFoil Silver Shattered Glass Foil Sheet on one of them, put in the parchement paper pocket, and run it through the laminator.

I removed the foil paper and woalah! Look at the gorgeous sparkle and shine on the jar image. I leave it as is, to color. I added it on the card with liquid adhesive glue.

I printed some of the sentiments in black and white with printer, trimmed them into sentiment labels, and added one of them on the card with liquid adhesive glue. I embellished the card with some of the clear sequins.

I hope you like this card today. Thanks for stopping by my blog. Have a wonderful day!

Graciellie Design Favorite Ever Blog Hop & Giveaway

Hello hello hello everyone! Happy Monday… Let’s start this week with new hope, thanksgiving, and positive thoughts. And… Today I have several cards to share with you with hope they will make you smile.

These cards I created using some of my favorites digital stamps, digital SVG cutting files, and digital papers from Gracillie Design. Gracie and her design team are also sharing their projects. Check the blog hop details and list at Gracie’s blog today. Find out how you can enter the giveaway at the bottom of this post.

My first card, I used one of the beautiful Magnolia Dreams digital papers pack for the background. I printed it on a 4×6 photo paper, trimmed it into 4″x5.25″, and added it on top of a A4 white card with E-Z Runner Grand.

I cut out couple white cardstock with one of the Craftin Desert Divas – Inside Scalloped Rectangles Dies, then I stacked them together with permanent adhesive glue. I added the vellum paper on it with the permanent adhesive glue and then I added on the card with the same adhesive. I held it down with large acrylic stamping block for couple minutes to make sure it dried well.

I printed the 4 flower mug images from the Fresh Start Digital Stamp Set on a watercolor paper with laser printer. And then I cut them with my Silhouette Cameo 3 using PixScan Mat and their software for scan and cut.

I colored the flowers with Leisure Arts Double Ended Markers and waterbrush. I dried it with craft heater.

And then, carefully I dabbed some of the DecoFoil Liquid Adhesive using make up sponge around the mug, let it dried, and then I added the DecoFoil Silver Shattered Glass Foil Sheet on the cup and gently rubbed it to transfer the foil on the mug. I added it on the vellumed frame with 3D foam tape.

For the sentiment, I cut one of the DecoFoil Toner Sheets using my Silhouette Cameo 3 with the phrase from the Shine On SVG File. After that, I added the DecoFoil Turquoise Transfer Sheets and run it through the laminator. I distressed it a little bit with craft sanding block and I added it on the cup with DecoFoil Liquid Adhesive and some 3D foam tape, too.

On the second card, I used the Magnolia Dreams SVG Files for the background. I cut a piece of black cardstock with my Silhouette Cameo 3 using the background file and border file. I added the background on a white card with DecoFoil Liquid Adhesive.

Using the same technique, I print-and-cut the flower from the Life Happens Digital Stamp Set using Silhouette Cameo 3 and watercolor paper. I colored the flower with Leisure Arts Double Ended Markers and waterbrush. I dried it with craft heater and then I added it on the card with DecoFoil Liquid Adhesive. I added some white paint splatters on the card with acrylic spray paint and fan brush.

I also printed the sentiment on a white cardstock and I trimmed it into a sentiment label.

For the foiled sentiment, I cut Shine On SVG Files with the DecoFoil Toner Sheets and my Silhouette Cameo 3, this one I added the DecoFoil Silver Shattered Glass Foil Sheet and run it through laminator.

I added both of the sentiment word and label on the card with 3D foam tape and then embellished the card with some clear gems.

For this third CAS card, it is a pretty quick and easy to make. I used the border die cut that I cut before. It is from the Magnolia Dreams SVG Files. I added it on the top folded card with DecoFoil Liquid Adhesive. I added some white splatters using white acrylic spray paint and fan brush.

For the sentiment, it is one of the phrase from the Have Faith SVG Files. I used DecoFoil Toner Sheets and DecoFoil Turquoise Transfer Sheets. I used the same technique I did the the previous word die cuts using my Silhouette Cameo 3 dan laminator. I embellished this card with some of the natural twine ribbon.

BLOG HOP, GIVEAWAY and SALE

For a chance to win a gift card to the shop:
1. Follow / subscribe to each of the blogs on the hop, starting with Graciellie Design.
2. Click on the designers names here and comment on each blog hop post.
3. Follow Graciellie Design on 
Facebook, for an extra chance to win!

It’s a long post, isn’t it? I hope you all enjoy reading it… So, tell me… what is your favorite from Gracie’s digital designs?

And…. before you go blog hopping… check ALL the stamp sets chosen by each designer as their favorite will be 40% OFF this week only! (No code needed.) Click HERE to shop.

THANK YOU SO MUCH for stopping by today… I hope you all have a fabulous, blessed day!


I link up the project at:

Blessed | CAS Shaker Card

Hello everyone… I hope you all have a blessed day! Today, I would love to share a this a CAS, shaker card

For my background card, I used one of the beautiful Pink & Blue Watercolored digital paper pack from Graciellie Design. I printed it on a white cardstock with inkjet printer. I trimmed it to fit on the front of an A2 white card. I added the patternen paper on the card with E-Z Runner Grand.

For shaker window, I used one of the Craftin Desert Divas – Inside Scalloped Octagons Dies. I cut out 2 piece of white cardstock, stacked them together, and added a clear acetate on it. I used double sided tape. I added on the card with 3D foam tape and for the shaker filler, I used clear jumbo sequins and jumbo clear glitter.

On top of shaker window, I added the Blessed word die cut with clear adhesive glue. I cut out the word using Craftin Desert Divas – Greeting Word Dies and light blue cardstock

I hope this card gives a little smile on your face and inspire you to play along with the Happy Little Stampers – Anything Goes With Dies Challenge.

Thank you so much for stopping by. Have wonderful week!


I also link it up at:

Anything Goes Week 402-403

Caffein Fueled Paper Play | Odd To Craftin Desert Divas

Hello everyone… Today, I join my friend, Lisa, at her Caffein Fueled Paper Play post at Coffee Loving Cardmakers blog.

She is featuring one of the Super Sponsors, Craftin Desert Divas. Last month, the owner of Craftin Desert Divas announced their store closing. They have been great sponsor for our coffee loving community!

On both of my cards today I used their coffee themed digital stamp sets and also die sets. Their digital stamps come in black-and-white and pre-colored images and sentiments.

I imported the images to my Silhouette Studio software, turned on the print-and-cut feature, , resized the images, printed them on a white cardstock, and them cut with my Silhouette Cameo 3. Pretty easy and quick process, also I don’t have to fussy cut them.

I also used both of their rectangular and circle dies on each card.

For the sentiment, I simply printed them on white cardstock and then I trimmed them into sentiment strips.

It is a fun and quick way of creating cards with digital stamps. I hope you like them.

For more inspirations, head over to Coffee Loving Cardmakers Blog.

Thank you so much for stopping by my blog today. Have a fabulous caffeinated day!