Helen G. Designs Stencils | New Release Blog Hop and Giveaway

Hello hello hello everyone… Today… I have a very exciting and happy news to share with you all…

My new line of stencils – Helen G. Designs – goes live today at STAMPlorations store today!!! YES… you read it correctly! I am designing stencils and Shery is offering me an a spot at her store. I am overwhelmed with joy and grateful. Here’s a little story about what drives me to start designing:

Designing has been something I’ve been dreaming of doing since I was at middle school when I started with dress sketches. I never thought that this designing dream would come through now. This idea of designing stencils was started with my love for mixed media projects when I joined STAMPlorations team. I love using stencils to create some backgrounds for my projects so I started to make my own. I sketched some shapes on my table using one of the sketch apps, and then I turned them into some stencils that I cut with my electronic cutting machine. I am still at learning stage of designing but I love doing it! I hope that through this opportunity, I can keep learning, growing, and continue designing more.

All of my designs are inspired by drawings that you can do with pencil or makers on projects. The sky is the limit to use these 6 stencils and with them creating backgrounds will be easier!!!

Hope you will like them and enjoy to create with them. Thank you so much for your supports and love. I cannot wait to see your projects!”

To celebrate this new release, STAMPlorations Girls have created projects with the stencils for the new release blog hop. I also have some projects to share with you all…

First project is this art journal. I used the Make Marks 1 ARTplorations Stencil, Make Marks 6 ARTplorations Stencil, Happy Flowers ARTplorations Stencil, Say It Big Bloom Stamp Set, Art Marks Stamp Set, and Mixed Media Elements Stamp Set.

In the video, all of those prints are printed with all of my 6 stencils, gelli plate, and acrylic paints. I used some of them on these 2 cards and others saved for future projects.

On this card, I use Make Marks 2 ARTplorations Stencil, Make Marks 5 ARTplorations Stencil, For The Birds Stamp Set, and For The Birds CUTplorations Dies.

And on this card, I used the Make Marks 2 ARTplorations Stencil, Make Marks 4 ARTplorations Stencil, Make Marks 5 ARTplorations Stencil, Make Marks 6 ARTplorations Stencil, and Healing Herbs Stamp Set.

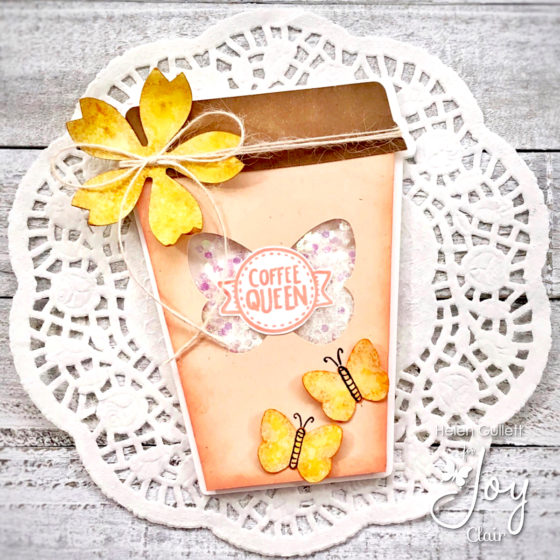
On this card, I use the Make Marks 3 ARTplorations Stencil and Blossom Overture Stamp Set.

Technique I used to create the background is called monoprinting with stencil or other will call it stamping with stencil using watercolor paint. After the background dried, I stenciled the x on top of it with Archival black ink and blending brush.

GIVEAWAY

Shery is so kind to host a giveaway for my new stencil release day!!! It is simply to visit and leave comment at STAMPlorations Blog Post and all the STAMPlorations Girls’ blogs where you all will see AMAZING PROJECTS!!!

And here are the Prizes to win:

  • ONE (1) winner of a $15 gift code to the STAMPlorations store
  • TWO (2) winners of their choice of 2 Helen G. Designs stencils.

The Commenting closes on May 8 and the winners will be announced on May 10 in the April winners post at STAMPlorations Blog.

I hope you all be inspired by each project that they shared using my stencils. THANK YOU THANK YOU THANK YOU SO MUCH for all your supports and love!

National Tea Day 2019

Hello everyone… Happy National Tea Day! Today we are going to celebrate it with special collaboration blog hop with Coffee Loving Cardmakers and Honey Bee Stamps!

You can find all the details about this collaboration blog hop and details on the giveaway prizes at Coffee Loving Cardmaker’s Blog today. And today, I have these two tea themed cards to share:

I use the Tea Time Stamp Set, Tea Time – Honey Cuts, and Perfect Blend Stamp Set from Honey Bee Stamps.

On the first card, I stamped the lemon and heart on a white cardstock using Catherine Pooler Premium Dye Ink Pads to create the background and then using water brush, I colored the heart with the dye ink which is reacted easily with water. And then after that, I trimmed it shorter than the A2 card and I added it on the yellow card with adhesive glue.

I created distressed watercolor panel with smooshing technique using Catherine Pooler Premium Dye Inks and water. After it dried, I stamped the cup and cut it with the matching die with my diecutting machine.

I stamped the sentiment on the card with Black archival ink and then I added the cup on the side with 3D foam tape for extra dimension.

On this second card, I used the same smooshing technique to create the soft pink watercolored panel with Catherine Pooler Premium Dye Ink and water. I trimmed the panel diagonally and added on a white card with adhesive glue.

I stamped the word “Tea” with dye ink diagonally aligned with the bottom paper. I just eye-balling it to create the word background.

I cut out a piece of burlap with circle die and I added it on the paper with permanent adhesive glue and I put couple acrylic blocks on it to keep it in place while drying.

I stamped the mug on a white cardstock with Black archival ink pad and colored it with Arteza Woodless Watercolor Pencils and waterbrush. And then I cut it with the matching die with diecutting machine. I added the mug in them middle of the burlap circle with strong adhesive and 3D foam tape

I stamped the flowers with Catherine Pooler Inks and then cut them also with the matching die. I added them on the top right of the mug with permanent adhesive glue.

Last, I stamped the sentiment with black ink on a white cardstock, trimmed it into sentiment banner, and I added it on the bottom of the mug with 3D foam tape and permanent adhesive glue.

I embellished the flowers and the card with some of clear gems that I had in my stash.

Blog Hop and Giveaway

Here’s the full list of the blog hop participants where you can visit each of the blog to see their project. While you are there, don’t forget to leave a comment for a chance to win the giveaway prize.

Coffee Loving Cardmaker’s Blog

Lisa Bzibziak

Helen Gullett –> You’re here

Katie Brooks –> Next Stop

Dana Warren

Erin Thiem

Kerry Urbatch

Laurel Seabrook

Kathy Schweinfurth

Amy Tsuruta

Brenda Noelke

Carol Hintermeier

Honey Bee Stamps

Carrie Bryant

Amy Rysavy

Galina Filippenko

Carly Minner

Keiko Ichikawa

Jana Millen

Bibiana Cameron

Kelly Latevola

Jo Ann Danchik

Alba Castejon

I hope you all enjoy my projects today. Thank you so much for stopping by my blog. Have wonderful day!

Thursday Coffee Break | Thank You Mocha Much

Hello everyone… Happy Thursday! Today, I have a fun mocha shaker card to share with you all

It is my turn to share a project at Coffee Loving Cardmakers Blog for the Thursday Coffee Break. And today, we are taking a break with this shaker card.

I created this card using the Bloomin’ Spring Coffee Basket stamp setand Coffee Petite stamp and die set from our super sponsor, STAMPlorations.

And before you all go… Enjoy the Spring Sale and save 25% OFF on all Spring themed products! No code needed — the discount is automatically applied to qualifying products on checkout.

Here’s a code for you to use also when you check out – STAMPGIRLHELEN – you can save extra 20%!!!

I hope you all will enjoy the post today! Thanks for stopping by.

Spring Fling Day Wrap Up | Bloom and Grow

Hello everyone… Today is the wrap up day for the STAMPlorations Spring Fling 2019! And I have one more Spring themed card to share with you all

It is an easy CAS card to make using the Sweet Spring Wishes Stamp Set, Spring Flower Layering Dies, and Crazy Double Running Stitch Rectangle Nesting Dies.

I created the soft watercolored panel background using Catherine Pooler Inks and water. After that I cut it with the largest size of the Crazy Double Running Stitched Rectangle Nesting Dies. I added it directly on a white card base.

I cut out the Spring flower die with black cardstock and the layer die using vellum paper. I stacked them together with permanent adhesive glue. I added the twine on the card, secured it with adhesive permament glue, and then I added the flower on the twine wreath with the same adhesive.

I stamped the sentiment from the Sweet Spring Wishes with VersaFine Onyx Black ink pad right below the flower.

Check out all the 12 Days of Spring Fling Posts and Giveaway to see more of the inspirations from the STAMPlorations Girls. And here’s today’s extra giveaway prizes that you can enter to win:

And before you all go… Enjoy the Spring Sale and save 25% OFF on all Spring themed products! No code needed — the discount is automatically applied to qualifying products on checkout.

Here’s a code for you to use also when you check out – STAMPGIRLHELEN – you can save extra 20%!!!

THANK YOU so much for stopping by!!!


I link up at:

Coffee Queen Shaker Card

Hello…hello…hello everyone… Today, I have Spring inspired coffee queen shaker card to share with you all!

This month is special becuase Joy Clair is having a collaboration with The Cutting Café. We are collaborating stamps and cutting files from both companies on our projects.

And… It is my turn today to share a project today at Joy Clair Blog. I am sharing for more about how I created this coffee shaker card there.

I use the Coffee Quotes Stamp Set and Coffee Talk Stamp Set for the sentiments on this card.

And I use my Silhouette Cameo 3 to cut the svg cutting files from Coffee Cup Shaped Card 2 Template Cutting File and Layered Butterflies Cutting File.

I like how this gift card holder card turn out and I hope you all will like it, too! Don’t forget to check out the other projects from my teammates in this month featuring Joy Clair Stampsand The Cutting Café.

Thank you so much for stopping by my blog today. Have a fabulous, caffeinated day!