Coffee Loving Cardmakers and Joy Clair Collaboration Blog Hop

Welcome everyone to Coffee Loving Cardmakers and Joy Clair Collaborations Blog Hop! Both design teams are teaming up to share coffee themed projects showcasing the Joy Clair Coffee Themed Stamps collection.

And…this collaboration blog hop is not only full of fabulous inspirations from the team members, but also Joy Clair is giving away 2 Gift Cards to 2 lucky winners!!! For chances to win, read all the details at the end of my blog post 🙂 Let’s get to my project… I have 2 mixed media projects to share that I created using Coffee Lovers Stamp Set and Christmas Coffee Stamp Set.

I started with creating the background. I found a fun YouTube tutorial using alcohol inks and gold foil that I decided to try. I used Alcohol Ink – Natural Walk Set of 3 and Gold Mixative Alcohol Ink for this background.

I added the alcohol inks on glossy photo papers. I spreaded the inks by blowing it with straw, and I also added some Alcohol Ink Blender Solution for more texture. I let it sit for a couple of minutes, or until it was kindda tacky with I touched it. And then, I added the gold foil on them. I ended up with these unexpected fun results!

On my first project, I added some white gesso on the tag that I cut out of watercolor paper, and then I made some marks on it using toilet paper roll, old credit card, and plastic knife. After it dried, I sprayed some of my homemade sprat paints on the tag. I dried it with craft heater, and then I added some of the tissue papers with gel medium. I added the gold thread with some dries-clear adhesive glue, set aside to dry.

For the cup, I stamped the cup from the Coffee Lovers Stamp Set on one of the alcohol inked paper using Mini MISTI and Jet Black StazOn Ink Pad, and I stamped it again on a plain white cardstock with Nocturne VersaFine Clair Ink Pad. Once they all dried, I fussy cut them with micro-tips scissors.

I stamped the one of the sentiment from Coffee Lovers Stamp Set on the cup sleeve with Blue Belle and Purple Delight VersaFine Clair Ink Pads. I added the sentiment sleeve on the cup and also the lid.

I added the finished cup on the tag using 3D foam tape and strong dries-clea adhesive glue. I added clear blog on top of it to hold it in place while it was drying.

On my second project, it is a mixed media card. I created the background with some Gold Screen Ink and White Acrylic Paint. I added them on a piece of watercolor paper. I trimmed it slightly smaller than the card base. I added the panel on the card base with dries-clear adhesive glue.

I stamped the coffee sentiment from Coffee Lovers Stamp Set on the background panel with the Nocturne VersaFine Clair Ink Pad using second generation stamping technique to get the shadow look on it. I dried it with craft heater.

For the cup, I stamped one of the cups from the Christmas Coffee Stamp Set on one of the alcohol inked paper with Jet Black StazOn Ink Pad using Mini MISTI. After the ink dried, I fussy cut the cup with micro-tip scissors and then I traced cup with white gel pen.

I stamped one of the sentiments from Coffee Lovers Stamp Set with Blue Belle VersaFine Clair Ink Pad using Mini MISTI on a white cardstock. I trimmed it into sentiment banner.

I added some of the natural twine ribbon on the panel with dries-clear adhesive. And then I added the sentiment and cup on the card with 3D foam tape.

And that’s all about my mixed media coffee themed projects…

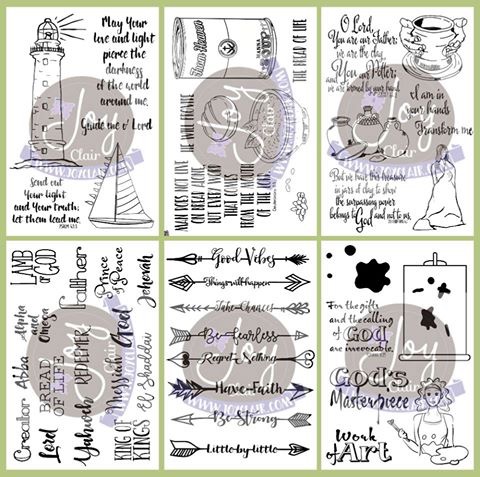
Check out all the Joy Clair Coffee Themed Stamps collection and they just released a new stamp set this month, Coffee Talk Stamp Set.

***GIVEAWAY***

To enter the giveaway, you all simply leave comment on each blog post participant. Let them know what do you think about their projects. Here is the full list of the Collaboration Blog Hop participants:

Joy Clair Blog

Kerry Urbatch

Helen Gullett –> You’re Here

Donna Green Idlet –> Next Stop

Ceal Pritchett

Monica Maier

Angie Cimbalo

Nicole Winslow

Martha Lucia Gomez

Jenny Fruchey

Lindsay Adreon

Coffee Loving Cardmakers Blog

Amy Tsuruta

Laurel Seabrook

Lisa ReynoldsBzibziak

Robyn Jordan

Becca Cruger

Dana Warren

Erin Thiem

Kathy Schweinfurth

Katie Brooks

I hope you all like my projects and be inspired. So… which Joy Clair Coffee Themed Stamps is your favorite?

THANKS A LATTE for stopping by my blog. Have a fabulous caffeinated day!!!


I link up at:

SaveSave

SaveSave

SaveSaveSaveSave

SaveSaveSaveSaveSaveSave

CUTplorations May Challenge ~ Things With Wings

STAMPlorations

Hello everyone… This whole month of May, we are the 31 Days of Celebrating Spring at STAMPlorations Blog. All the blog hop, linky partyies and challenges have one theme: Things With Wings.

For this CUTplorations May Challenge, you are challenged to use anything with wings and must have die cuts on any type of new projects you created. Go here to read the full details, rules, to link up your project(s), and to see what prizes you can win for this challenge.

I created a clean-and-simple, mixed media card for this challenge. So, I started with creating the background. On a watercolor paper, I sprayed and splattered the Heidi Swap Color Shine Spray (Citron and Mint Green). I dried it with craft heater and then cut it with the largest size of the Crazy Double Running Stitch Rectangle Nesting Dies. I added it on a card base with E-Z Runner Grand.

After that, I stamped the one of the sentiments from For The Birds Stamp Set using VersaFine Clair Nocturne using Mini MISTI tool. Since it is a pigment ink pad, I dried it with craft heater to make sure it dried well and not smudge.

Next step, I painted the rainbow colors using only 3 primary colors – red, yellow, blue – on a watercolor paper, blended the colors with watercolor brush and water. I dried it with craft heater and then cut it using one of the For The Birds Dies. I added it on the card with Art Glitter Dries Clear Adhesive Glue.

That’s my card for this CUTplorations May Challenge. I hope you all enjoy it. For more inspirations, make sure to head over to the blog to see the projects from the team.

Before you go, I have a coupon code for you to save 20% of your order at STAMPlorations store. Use this code: STAMPGIRLHELEN when you check out. This code good for all regular and sale-priced stamps, stencils, and dies.

THANK YOU so much for stopping by my blog today. Have a wonderful day!


I also play along at:

Challenge Weeks #332-#333 Anything Goes

Simon Says: Animal Magic

May Link Party – #39

SaveSaveSaveSave

SaveSave

The Cut Shoppe NSD 2018 ~ Large Title With A Cut File Challenge

Welcome to The Cut Shoppe‘s National Scrapbook Day 2018 (more than one day) celebration!!! We’ve got lots of fun things happening over the next four days, so make sure you check out everything in this post, so you won’t miss out! Also… there are FREE cuting files for you to grab!!!

Today challlenge is the Challenge No.3 ~ Large Title With A Cut File. I created this set of rainbow cards using the Hello There Cut File. It is perfect cut file for sentiment or title.

I open the PNG file with Silhouette Studio Desinger Edition software. And then using the Tracing tool, I traced the image, clicked the Trace bottom, then create cutting file. I resized it to fin on the front on 4 1/4” x 5 1/2” (A2) cards.

After I rezised it, I cut the file with Silhouette Cameo and use 80 lbs white cardstock.

For the watercolor washed backgrounds, I used smooshing technique to create them. I used watercolor papers. First, I added the Distress Oxide ink on the craft mat, sprayed with water, and them smoosh the paper in the ink. I dries it with craft heater for each time I added layer of colors. Adding extra texture on it, I sprayed some water using Distress Sprayer and then I dabbed it off with paper towel. I repeated the steps for all the colors.

After all the backgrounds done and dried well, I distressed the edges with Distresser tool. If you do not have this tool, you can use scissors to get the same effect, but have to be very careful.

I added each diecut sentiment on each watercolored background with Art Glitter Dries Clear Adhesive Glue. After that, I added each finished panel on the A2 card bases using Ez-Runner Grande.

I wrapped each card with natural twine ribbon and I added some matching color sequins on each card. They are finisned.

Now, it’s your turn to play along! Head over to The Cut Shoppe Blog for all details about the challenges and to link up your projects.

Thank you so much for stopping by my blog today! I hope you all can join our challenges this week! Have a fabulous day!


I also link up at:

Die Cut Diva’s Challenge – May

Challenge Week 332-333 Anything Goes


SaveSave

Desert Rose Art Journal – Graciellie Design New Release

Hello everyone… May brings all the beautiful flowers. We have some that already blooming, and some are coming up soon… Inspired by flowers, today I have a Desert Rose Art Journal for this month that I created using the new digital stamp.

This new Desert Rose digital stamp is design by from Gracie. She has beautiful digital stamps and papers collection at her Etsy store, Graciellie Design.

I use this digital stamp on my May art journal. They are just so pretty!

I open the files with flower picture editing program, resized them into 3 sizes and then printed them with my inkjet printer on a heavyweight white cardstock. After that I fussy cut them with micro-tip scissors.

I colored them with Leisure Arts Watercolored Pencils and brush. I colored each of the bottom and tip of the petals and leaves. And then using watercolor brush and water, I pulled the pigment to fill the rest of the image. They turned into watercolored flowers. I set them a side to dry.

For the mixed media background, I started with adding acrylic paints (yellow and red) on my Canson Mixed Media journal page with brayer.

And then using used bubble wrap, I stamped it randomly on the page with black paint.

Once the paint dried, I added the homemade texture page on it with an old credit card. I spread all over the page thinly. And while the texture page still wet, I stamped the Joy Clair – Broken Brick Background Clear Stamp on it to give the wall texture on it. I cleaned the stamp right away with warm water so the texture paste won’t stuck on the stamp.

I added some Heidi Swapp Gold Screen Ink on brick texture and let it dry.

For the sentiments, I resized them to be big enough for the page. I printed them and trimmed them into rectangles. I drew the frame line using Faber-Castell PITT Artist Pen.

All the pieces are ready to be put together. I added the flowers and sentiment with Aleene’s Tacky All Purpose Glue on the texture page. I finished the page with some white paint that I added it on the page using fan brush.

I love finding inspiration from the nature, especially flowers 🙂 I hope you all also can enjoy this art journal today. Thank you so much for stopping by my blog today. Have a fabulous day!


I also link up at:

Art Journal Journey – Flora and Fauna

Challenge Week 332-333 Anything Goes

SaveSave

SaveSaveSaveSaveSaveSave

SaveSave

SaveSave

SaveSave

SaveSave

SaveSaveSaveSave

SaveSave

SaveSave

SaveSave

SaveSave

Joy Clair New Release Blog Hop and Giveaway

Hello everyone… Welcome to the Joy Clair New Release Blog Hop and Giveaway! The blog hop starts at Joy Clair Blog. This time, Joy Clair is releasing 12 (twelve) amazing new clear stamp sets, including the Everyday stamps and Color By Faith – Bible Journaling stamps.

I created a simple mixed media card using the new Broken Brick Background Stamp for the background and the Rose Sentiment Stamp Set for the sentiment.

I started with creating the background using watercolor paper and Distress Oxide Inks: Worn Lipstick, Cracked Pistachio, and Broken China. I used smooshing technique and dry the panel each time I added colors. After that, I sprayed some water with Distress Sprayer, dabbed it off with paper towel, and dry it with craft heater.

Using brayer, I added grey acrylic paint on the Broken Brick Background Stamp and I stamped it on the background panel. Craft Acrylic paint dries quick. Once it is dry, I added the grey shadow around the edges using sponge using Distress Oxide Ink – Iced Spruce. I added the finished background panel on a card base with adhesive glue.

For the sentiment, I stamped it on another watercolored paper with Distress Oxide Ink – Iced Spruce and cut it with one of the stitch dot dies. I added it on the card with 3D foam tape.

***GIVEAWAY***

Let’s start the fun with the creativity and remember that we always have prizes for our readers and visitors that comment HERE in our corporate blog and in ALL the designer blogs during the hop.

JC_GIFTCARDS

Just leave your comments and tell us which is your favorite stamp set! Here is the complete list of the Blog Hop:

Joy Clair Blog

Angie Cimbalo

Martha Lucia Gomez

Monica Maier

Kerry Urbatch

Donna Idlet

Nicole Winslow

Jenny Fruchey

Helen Gullett –> You’re Here

Andrea Bjork –> You’re Next Stop

Ceal Pritchett

Lindsay Andreon

Have fun and get inspired!!!

Thank you so much for stopping by my blog and I hope you all enjoy my project. Have a wonderful day! SaveSave

SaveSave

SaveSave

SaveSave

SaveSave