I went to a blogging conference, Declare Conference, in Dallas this weekend. It was amazing conference for women. I got to meet some of my friends I met on Social Media groups (Facebook, Twitter, Instagram, Blogging) IN PERSON!! We got to spent time together and I share hotel room with 3 of them. I will share some pictures later this week 🙂
So, when I found out that I would have roommates, I started to look for inspirations. I decided to make a business card holder/wallet for them because we were suggested to bring business cards to swap with others there. So, Pinterest where I went for more ideas. I found so many tutorials using sewing machine and they said that it was for beginner. I told myself, “Helen, this is the time to learn and try using your new sewing machine.” I tried. But failed. It was not because of their tutorials, but it was because of my lack of ability of using this machine! Check these sewing tutorials if you want to try 🙂
I still have LOTS of felt leftover from our craft making party last year and why not using felt and hand stitching, I talked to myself. And there went I tried. Adapting from this sewing tutorial, I made single card wallet/holder with felt. And I wanted some textures on my felt, not just plain felts. I remembered this embossed felt tutorial from Becky Fleck and decided to try when I made these business card wallet.

Supplies you will need to make this business card wallet/holder:
- Felt
- Iron
- Needle and thread
- Scissors
- Rotary cutter
- Pinking shears
- Ruller
- Spray bottle and clean water
- Rubber stamp of your choice

my ruler is too long for this picture… sorry.
You will need 1 of 4″ x 2.5″ rectangle and 1 of 3″ x 2″5 rectangle. I cut my felt using my rotary cutter and quilt ruler, quick and easier than using regular scissors.

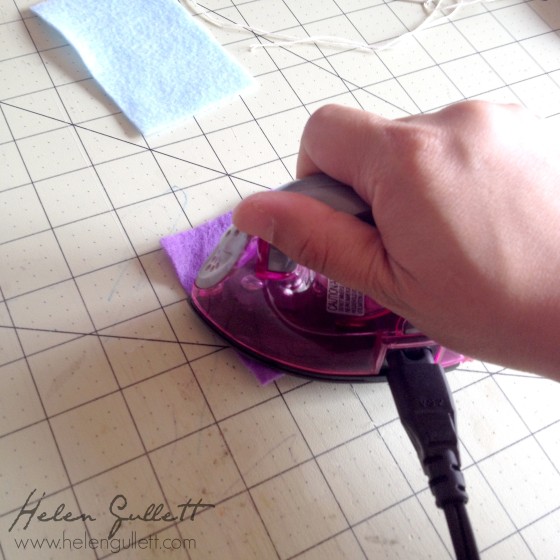
Lay the felt on top of the stamp that you want to use. For this first one, I laid my smaller felt on top of one of the butterfly rubber stamp from Denami Design – Fancy Flutters stamp set and using my spray bottle I sprayed the felt lighty with water.

The iron I used is a tiny one I found at Walmart (or you can find at any craft store). It is not too hot for craft projects. So, I press the felt on the rubber stamp with my iron for about 15 seconds. Don’t be too long. But if the impression is not what you want, you can press again for another 10-15 seconds.
Here’s what the embossed felt look like after the ironing:

Then last step is to put them together. Lay both felt on top of each other and stitch. I used blanket stitching to make the pocket. You can use the pinking shears before or after the stitching together for the decorated border top.

Here’s another one I made using one of the rubber stamp from Taylored Expressions – Sky’s the Limit stamp set.

And this one I decided not to embossed the felt but added a crochet doily on it. The pink is just fit with the dark and light chocolate 🙂

So that’s the simple project I made for my conference roommates 🙂 Thank you for visiting my blog today! Have a fun crafty day!
Like this:
Like Loading...


