Get Crafty In Between…

Almost a month ago we went to a new member training to serve with Wycliffe Associates at their headquarter office in Orlando, FL.

They had 3 full day training for us plus orientation about the organization. We got to meet the President, Vice President, Program Director, HR staff, Training Department staff and many other volunteers who came to the office while we were there.

We were sent home with a lot of information and excitement to start the ministry with them from home.

I have been working from home with the people in SEA* and also translating some training materials from English into the national language.

Super excited but also it is a big challenge for me to manage my time as a wife and a mom who has a daughter going to Kindergarten and a toddler girl stays home with me.

For that, my time to craft is got shorten. I don’t mind since Family and Ministry are priority. Crafting, making card and scrapbooking are hobbies I enjoy doing in between, when I can.

My husband had a request, he asked if I could make him a phone sleeve out of felt for his new iPhone 6 just like his old iPhone 5 felt sleeve. He showed me the old case and I thought I could probably could do it. So, last night I had a chance to sit to finish it and did couple phone sleeves for me and my hubby.

These are finished ones after many trials and errors I did in the last couple days. Fortunately, I have TONS of felt in stash, so no worries 🙂

IMG_2262.JPG

What you need to make this sleeve are:
– Felt
– needle and thread (sewing machine, optional)
– Ruler
– Rotary cutter
– Thin Double-sided quilting adhesive tape (if you want to double the felt like I did)
– Pinking shears

First, cut the felt in 11.5″ x 3.25″ using rotary cutter. I found cutting felt and fabric with rotary cutter is so much easier than using scissors. But always remember to have pad underneath.

I double-layered the felts for sturdiness. So, stack together both felts using the quilt thin double-sided adhesive tape. But if you have thicker felt, then you don’t have to.

After they are secured with the tape, fold it into half to make the sleeve. And start backhand-stitch them or you can use your sewing machine.

Feel free to add any embellishment on the front of the sleeve if you want to.

All done. And they are pretty good just for handmade 🙂

DIY Felt Tablet Sleeve

IMG_2007.JPG

I was looking for a pouch of case or sleeve for Nexus tablet and Pinterest, as my go-to-inspiration-source. I found few posts on tutorials how to make an iPhone and external hard drive sleeve/case out of felt & handstitching.

So I was wondering if I could try to make a tablet sleeve instead of buying it.

And I tried. Success! And I am super happy with the result 🙂

It didn’t take a long time to make this. Basic material you will meed are:
– Felt in your your favorite color
– Scissors or rotary cutter
– Pinking sheer
– Ruler
– Needle
– Thread in matching color with the felt
– Valcero or button

First, measure the tablet. My Nexus is about 5″ x 7″

Then I measure the felt I wanna use. I found this darker grey in my stash. Using rotary cutter and quilt ruler, I cut my felt into 12″ x 7.25″

Then I fold to make the sleeve at 5″ from the bottom. Hold it with needle so it will stay in place when you hand-stitch its sides.

IMG_2021-0.JPG

This is what I love… Handstitching. I think this is what they call blanket handstitching. This blog post is an excellent tutorial with pictures.

IMG_2008.JPG

Last step is adding the fastener. For mine, I use adhesive Valcero. You can pick what you want to use for the sleeve flap.

I am happy for the result 🙂 And I hope you can follow these simple steps. If you have any questions, feel free to leave it as comment and I will try my best to answer it.

Thanks for visiting my blog today!

Virtual Blog Tour

It is Monday. As I am preparing myself to start this new week, no matter what we will go through this week I am reminded by the Lord that He is faithful and there is hope only in Him for those who depend on Him and to those who search for Him:

The faithful love of the  lord  never ends! His mercies never cease. Great is his faithfulness; his mercies begin afresh each morning. I say to myself, “The  lord  is my inheritance; therefore, I will hope in him!” The  lord  is good to those who depend on him, to those who search for him. So it is good to wait quietly for salvation from the  lord . (Lamentations 3:22-26)

A few weeks ago, my blogging friend, Ramona, invited me to join this Virtual Blog Tour. She is one awesome lady I met on blogging world who inspires a lot of her readers through link ups, reviews, inspirational posts, crafts and giveaways! Check out her blog here to see what she has shared with her readers.

Virtual Blog Tour is one fun blog-hopping to get to know each other and they have been doing. Each participant of this Virtual Blog Tour has to answer these 4 questions. And today I would like to share a little bit about me with you all 🙂

What am I working on?

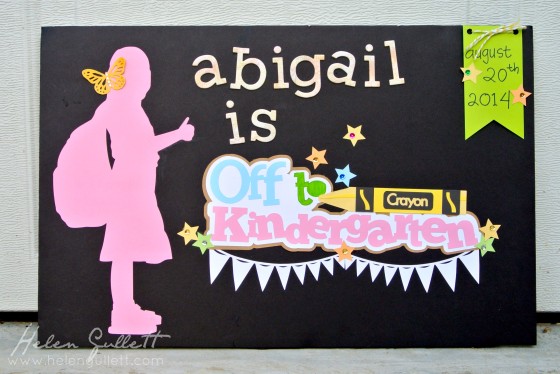
As a stay home wife and mom who has a kindergarten aged daughter and a pre-schooler aged girl, I am busy with them every single day 🙂 Right now, I am working on a lesson plan for my preschooler while the oldest at school.

IMG_1834

this picture was taken a few months ago… just a glimpse of what is happening in our loft almost every day 🙂

IMG_0006

I am also one of Wycliffe Associates volunteers working on a project for Pacific Area ministry. And I am a volunteer translator at YouVersion Bible App.

On my spare time, I blog, do scrapbook layouts, make cards, DIY, crafts with my girls and crafting with friends.

cards-collage-2014

How does my work differ from others of its genre?

In the last few months, I have been taking some times to seek God and reevaluate what I do and how it aligns with what He has called me to do. Couple weeks ago, when I attended a women blogging conference, Declare Conference, God confirmed me what and why. I know that God has given me the ability to do what I do to make his name known among to others through my role as a wife, a mom and a paper crafter.

What makes it different is that I do this as a servant to my Lord, a ministry to others. That brings joy and satisfaction in my heart, not only because it is my hobby or just because I can do it.

craft-collage-2014

Why do I write/create what I do?

I realize that through all of these what I am doing here is a preparation for me and my family to go serving the Lord overseas, among the people in SEA*.

I write because God has called me to share the stories He is writing in and through my life and my family. I write because of my hope more people to know the needs of the Good News to be heard in the languages of the people in SEA*. I write because I want more and more people to stand in the gap between these people and God, to intercede for them because they cannot.

I write because I am their voices to you.

I am writing and creating with a mission for a mission.

taken by Daniel B., Wycliffe Vision Trip 2005

taken by Daniel B., Wycliffe Vision Trip 2005

How does your writing/creating process work?

I am inspired by a lot of people and learn from a lot of people. My writing process is not as easy as I write in my first language, but I am thankful for many times God helps me through a lot of friends and teachers, especially with my husband who has been a great help for me to improve my English, written and spoken.

First, I write my first draft which come from a lot of resources, for instance my quite time with the Lord, reading the Bible or reading a book, even every day life is full of inspirations to write 🙂 Then after I get my first draft, I will go back to read it again and write more. Sometimes, I post after editing my second draft, but sometimes, I need to go back and edit again for the third or fourth time.

scrapbook-collage-2014

And for my crafting process, I like to work with sketches. First, I will make plan. Right now, I am working with my daughters’ first year scrapbook albums. So I gather all of their pictures I want to put on the albums. Second, I will  find sketches or templates (for digital scrapbooking), then work on them as I can. For digital scrapbook layouts I created,  I want to make memory books for us to remember.

I love making handmade gifts and cards for family and friends. I make list what I want to make for who, search for inspirations and tutorials (from Pinterest, most of the time :D) and then I will work on them, sometimes I will ask extra time on the weekend to work on projects while my husband spend time with our daughters.

My church friends and I love to get together for craft night once in a while, for sure we always get together around October or early November to make hairbows and hairclips for Operation Christmas Child Show Boxes project.

thankyou_tag1

When I can, I take pictures of steps how I create my project to share here on my blog 🙂

Next stop of this Virtual Blog Tour is my creative friend, Padni. We met at Stuck On U Sketches Design Team. And the most amazing thing is that we come from the same country! She is a scrapbook maker and teacher, loves handmade craft, home living stuff and photography. Check out her blog on September 1 to get to know her and to see what she’s been up to 🙂

THANK YOU for visiting my blog today. Your visits brighten my day 🙂

DIY Back To School Sign

Our oldest daughter is off to Kindergarten this year. She has been waiting for this for a while, talked about it for weeks!!! We are thankful to know that she loves the idea of going to school. Our prayer that she will experience what God has stored for her this year at school and He’ll show her favor and love through her teacher. We pray also that she’ll learn to share and love her friends. This Mama is thankful, happy and worry at the same time. This is not only a journey for my daughter but also a journey for me and my husband to put trust in God to take care and protect her while she is away from us.

In the mean time… I get to spend time our second daughter at home, start teaching her one on one and having fun while her big sister at school. She misses her big sister A LOT!!!

To celebrate her first day going to school, I made her a sign… It was a big surprise for her at 7 on Wednesday morning! She cannot stop giggling and reading what’s written on the sign 🙂

082214-1st-day-of-kindergarten-hg

I found a black foam display board at home and cut the shapes using my Silhouette Cameo. The cutting files I used are: the girl with backpack is from Patty Young Designs, the big titles “Off To Kindergarten” and stars are from PPbN Designs, and banner pennant is from Samantha Walker.

The alphabet for her name is from Basic Grey chipboard sticker. The butterfly on the girl’s hair, I punched it using Martha Stewart monarch butterfly punch. I also added some sequins on the stars 🙂

Then I made a scrapbook layout also for this special moment. I used Pixelily Designs new Collecting Moment August kit (available on Ginger Scraps and Gotta Pixel):

2014-08-21-1st-day-of-kindergarten-pixelily

I pray for all of you, Moms! God is with your kids at school, fully protect and help them every single day at school.

Blessings!

DIY Embossed Felt Business Card Wallet

I went to a blogging conference, Declare Conference, in Dallas this weekend. It was amazing conference for women. I got to meet some of my friends I met on Social Media groups (Facebook, Twitter, Instagram, Blogging) IN PERSON!! We got to spent time together and I share hotel room with 3 of them. I will share some pictures later this week 🙂

So, when I found out that I would have roommates, I started to look for inspirations. I decided to make a business card holder/wallet for them because we were suggested to bring business cards to swap with others there. So, Pinterest where I went for more ideas. I found so many tutorials using sewing machine and they said that it was for beginner. I told myself, “Helen, this is the time to learn and try using your new sewing machine.” I tried. But failed. It was not because of their tutorials, but it was because of my lack of ability of using this machine! Check these sewing tutorials if you want to try 🙂

I still have LOTS of felt leftover from our craft making party last year and why not using felt and hand stitching, I talked to myself. And there went I tried. Adapting from this sewing tutorial, I made single card wallet/holder with felt. And I wanted some textures on my felt, not just plain felts. I remembered this embossed felt tutorial from Becky Fleck and decided to try when I made these business card wallet.

card-wallet-07

Supplies you will need to make this business card wallet/holder:

  • Felt
  • Iron
  • Needle and thread
  • Scissors
  • Rotary cutter
  • Pinking shears
  • Ruller
  • Spray bottle and clean water
  • Rubber stamp of your choice
card-wallet-01

my ruler is too long for this picture… sorry.

You will need 1 of 4″ x 2.5″ rectangle and 1 of 3″ x 2″5 rectangle. I cut my felt using my rotary cutter and quilt ruler, quick and easier than using regular scissors.

card-wallet-02

Lay the felt on top of the stamp that you want to use. For this first one, I laid my smaller felt on top of one of the butterfly rubber stamp from Denami Design – Fancy Flutters stamp set and using my spray bottle I sprayed the felt lighty with water.

card-wallet-03

The iron I used is a tiny one I found at Walmart (or you can find at any craft store). It is not too hot for craft projects. So, I press the felt on the rubber stamp with my iron for about 15 seconds. Don’t be too long. But if the impression is not what you want, you can press again for another 10-15 seconds.

card-wallet-04

Here’s what the embossed felt look like after the ironing:

card-wallet-05

Then last step is to put them together. Lay both felt on top of each other and stitch. I used blanket stitching to make the pocket. You can use the pinking shears before or after the stitching together for the decorated border top.

card-wallet-06

Here’s another one I made using one of the rubber stamp from Taylored Expressions – Sky’s the Limit stamp set.

card-wallet-08

And this one I decided not to embossed the felt but added a crochet doily on it. The pink is just fit with the dark and light chocolate 🙂

card-wallet-09


So that’s the simple project I made for my conference roommates 🙂 Thank you for visiting my blog today! Have a fun crafty day!